Friday, November 5, 2010

frosted cookies

Here are some photos of some frosted cookies I made recently for my grandfathers birthday. He has always loved horses and horseback riding so I decided to go with that theme since I knew it would make some cute cookies. 


This first cookie is a horse (there were several of each cookie however I only took a picture of one of each.) All of the cookies are chocolate and iced with royal icing.  (cookie recipe at end of post)


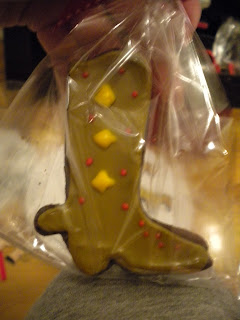
Here's a little cowboy boot (excuse the photo i started packing them before i took a picture)


Then we have a horseshoe


I packaged each cookie individually, then packed them all in a cute basket i purchased at michael's. Wrapped it all in cellophane then topped it with a bow and a little wooden horse decoration. This was then packed in a box and shipped off to Florida. I found this to be the best method for shipping things of this nature. There was only one casualty, one of the horses was sadly decapitated on the journey. 


Ingredients:
1/2 cup butter 
3/4 cup granulated sugar 
1 egg
1 tsp vanilla (rum or grand marnier could be used as a substitute)
1 1/2 cup flour 
5 tbsp cocoa powder 
1/2 tsp baking powder
1/2 tsp baking soda
1/4 tsp salt 


Instructions:
Preheat oven to 325F
Cream the butter until smooth then add your sugar and continue to beat until light & fluffy. Then add in the egg and vanilla. Beat until smooth. Mix together your dry ingredients then add them in two additions, mixing until just combined. Wrap and chill dough for about 1 hour or until firm enough to roll. Roll Dough to about 1/4 inch in thickness. Chill 20 minutes then cut into desired shapes. Place on parchment lined cookie sheet & bake (325F) 8-10 minutes  rotating tray halfway through. Let cookies cool a bit on tray first then move them to a cooling rack to cool completely before icing. 

Saturday, October 30, 2010

Happy Halloween


Happy Halloween everyone


Here is my halloween cake i made for the window display at work


I think this is by far my favorite cake i have made. I was really happy with the end result :] 


Hope you all enjoy and hope everyone has a wonderful halloween 

Monday, October 18, 2010

White Bean Ravioli with brown butter caper sauce


White Bean Ravioli with Brown Butter Caper Sauce 

The original recipe is from sandra lee, this is my edited version of it.
Recipe For Ravioli:

Ingredients:
1 15 ounce can navy beans 
1 egg
About 3 tbsp balsamic vinegar (i may have used a bit more, i did it by eye)
1/4 cup grated parmesan (if using fresh grated parmesan up it to 1/2 cup)
About 1 tbsp Italian seasoning 
1 tsp salt 
1 tsp pepper
2 tsp oregeno
1 package wonton wrappers (i use NaSoya wonton wrappers)

Recipe For the Sauce:
1 stick unsalted butter  
Italian Seasoning to taste roughly 2 tsp
Salt
1 tsp oregano 
3 tbsp capers 

Fresh grated parmesean for garnish


Instructions:
First you will need to make your filling, Drain then rinse the beans then mash them in a bowl, beat in the egg, then all the rest of the ingredients. Cover and refrigerate for 30 min (this can also be made the day before.)

Meanwhile you can make your sauce. Place the stick of butter in a large skillet and melt it, continue cooking until it begins to brown and gets a nutty aroma. Turn off heat then add seasoning and capers. Set aside. 

Bring a pot of water to a boil add some salt and olive oil to the water. You will need to work in batches only do about 4 at a time. Lay 4 wrappers out, and have a small cup of water near you. Place about half of a tablespoon in the middle of each ravioli. 


Then dip your finger in the water and run it around the edge of the ravioli.


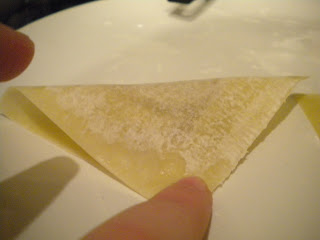
Then fold one corner over to the one across from it, creating a triangle 


Seal the edges with a fork


Place the raviolis in the boiling water for about 2 minutes or until tender.


Place the raviolis into the brown butter sauce, then place on serving dish. Drizzle with a small amount of sauce  and top with fresh grated parmesan. 


This is deffinately one of my new favorite meals :] 

Saturday, September 11, 2010

piping


Heres a cake i did recently, it's white fondant with royal icing piping 

This wasn't for anything special, i just wanted to practice on my piping 


I should be posting more stuff soon, just been really busy 

Wednesday, August 18, 2010

pizza

      
A brown turkey fig

So I know that i've been bad about updating. I just haven't had a chance to do any baking at home lately. So even though tonight's post isn't pastry i figured it was about time for an update. 

Tonight i made a fig and goat cheese "pizza" it's not really a pizza but not really sure what else to call it. 


It's pretty simple and sooooo good. Definitely one of my new favorite foods. 


Heres what you need:
Plain (or traditional) naan bread 
Goat Cheese
Figs (i used a combination of black mission & brown turkey figs 
Olive Oil
Thyme 


Balsamic Vinegar (optional)


You must first infuse your oil with thyme. Pull the leaves off the thyme trying to not get the stems (some of the small stems are fine) yes i know this is tedious and annoying but well worth it in the end. When you've added your thyme to the oil heat it in a pot on low heat for an hour (however since i'm impatient  i only did it until the oil was hot then took it off but it was delicious none the less. 


Brush your oil/thyme on the naan bread make sure to get the leaves on it with the oil. Then slice or  crumble goat cheese evenly over top. 


Now cut the stems off the figs the slice them and lay them evenly over top the goat cheese. Sprinkle with more thyme/olive oil. I then placed a sprig of thyme on top for visual effect. Place on a non stick baking sheet and place in the oven at 450 F. I didn't time it i jst checked on it a few times but if i had to guess i'd say about 10 minutes. You want the goat cheese to be melted, and the naan will be very dark around the edge it will be slightly burned but trust me it's good that way. 


The pizzas before they go into the oven 


While it's in the oven you can make a balsamic reduction to drizzle on top. This is very simple you just have to be careful to keep a close eye on it. 


Pour your balsamic vinegar into a pot (i did mine on a non-stick fry pan)
Heat on med-high if using a pot when it starts to simmer you must keep whisking it or it will burn if you use a fry pan i simply would swirl the pan every few seconds to keep it moving so it wouldn't burn. Do this until it is reduced by half and has thickened into almost a syrup consistency. 


When the pizza is done lightly drizzle the reduction on top and enjoy!!


Tuesday, July 27, 2010

The Great Luster Dust Massacre of 2010

So the other day i was opening this box that i keep all of my craft type things in. I also keep all of my cake decorating things in this box as well. So i was going through this box checking out what i had in it. As i was pulling things out of it i looked down at my leg and discovered this...

I then looked down at my floor and hand which was also covered with silver luster dust. could not figure out where it came from. I then found one of the little containers of dust which was completely coated with silver. I thought oh this must be the one maybe it got a whole in it or something (this one actually turned out to be gold not silver). So i put it in a little bag and started to clean the floor, but every time i cleaned somewhere more luster dust would just pop up somewhere else. I finally found the real source of the problem 

The cap had come off of the silver so the whole thing was all dumped into this bag and some in the box. I then realized how cool this looked on skin so i covered my hand 


Waste not want not right?


I  must say it looked much cooler in person, i looked like the tin man. 


So the moral of this story is don't keep your luster dusts in places where they can be jostled around since apparently there caps can come off quite easily. Or you'll have a luster dust massacre on your hands quite literally. 

Tuesday, July 20, 2010

madeline patisserie


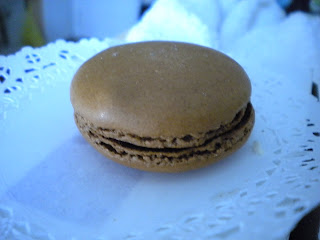
So today i went on a little trip to NY cake & bake to pick up a few supplies for a dummy wedding cake design i will be doing soon. I decided to check out this little place called madeline patisserie (or apparently la maison de macaroon since thats what the box said) which is really close by. I knew that they sold macaroons which i love so i decided to take a peak at what they had. The place is really small and cute its like a little french country home. They had about 15 different flavors and they were $2.50 a piece. Which is a bit pricey but not too bad because they were on the larger side. So i decided on  apricot champagne, white chocolate passion fruit, and caramel fleur de sel. I ate the apricot champagne on my way home so sadly i wasn't able to take a picture, but it was a beautiful bright peachy orange color and was delicious.


This was the caramel fler de sel, it was very good, the filling was a buttery semi-salty caramel.


Here is the white chocolate passionfruit. I took 2 photos of this because i wanted to make sure you could see the edible gold on :] fancy! 


My favorite was the apricot champagne it was soooooo good, i mean they were all delicious but that one especially.

So this has been my little review, if you live in nyc or plan on visiting i highly recommend checking this place out. 

If you wanna learn more about making macaroons i recommend this book its cute.

Friday, July 16, 2010

holy grail


So today at work i finished the holy grail cake i've been working on. If you haven't seen Monty Python and the holy grail you need to go rent it now! It is one of my favorite comedies. The person brought in a picture of the poster that they wanted it to look like.


It was a sheet cake with vanilla icing (colored blue) and all the decorations are made from fondant.


Now one of my favorite parts in the movie is the killer rabbit (if you haven't seen the movie then you won't really get it) but the rabbit wasn't in the poster but i added him in, i figured any true monty python fan would appreciate it.


I really enjoyed making this cake almost as much as the movie :]

Sunday, July 4, 2010

lychee nut cupcakes


So today i made some lychee nut cupcakes, with a coconut rum glaze. 


This recipe comes from vegan cupcakes take over the world, but i did a little tweaking to it. I think this recipe came out pretty good. It's not your typical cupcake, its not too sweet, and has a glaze as opposed to a frosting. So if your feeling adventurous and looking for something light and not too sweet, then this would be a good recipe to try. 


So first off heres a little info about lychee nuts for those of you who may be unfamiliar with them. Lychee nuts come from Lychee trees which are a medium-sized evergreen, that produce the small fruits. The Lychee nut has a pink-red rough textured rind that is in-edible. However this is easily removed, revealing a sweet, translucent white flesh. They are mainly popular in china, but have been gaining popularity in many other countries. They can be found fresh in many asian markets. They may also be found canned in many specialty grocery stores, or stores such as Whole Foods.


So here is the recipes:


Lychee nut Cupcake
Ingredients:
2 cups all-purpose flour
1 1/2 tsp baking powder
1/2 tsp salt
1 1/3 cup granulated sugar
5 tbsp ground flaxseed (or flaxseed meal)
1/3 cup oil (plus i added about 1 tbsp more)
1/4 cup coconut milk (plus i added about 1 tbsp more)
1 can (4 ounce) Lychee fruit drained, chopped, and syrup reserved 
1/4 cup lychee syrup (i added maybe 3 tbsp more)
2 tsp vanilla extract


Directions:
1. Preheat oven to 350F and line muffin tin with paper liners. 
2. In a large bowl, vigorously mix the flaxseed with 6 tbsp of water with a fork until gelatinous. Then add the oil, coconut milk, and lychee syrup to flaxseed mixture and mix to combine. 
3. Add your dry ingredients, and mix to combine. I found the mix to be very very thick which is why i added a bit more of the oil, coconut milk, and lychee syrup. Just use your judgement on how it looks add more of the lychee syrup than the other 2 ingredients, so it will have a stronger flavor. You want the consistency to be about as thick as boxed cake mix batter, maybe slightly thinner than that.
4. Fill liners about 3/4 of the way full and bake 20-25 minutes, until edges are browned and toothpick comes out clean. 


Coconut Glaze 
2 cups sifted confectioners sugar 
1/4 cup coconut milk
Dark rum to taste (i added about a capful and a half)


Mix all ingredients until smooth, them pour over cooled cupcakes. I used a piping bag to make it easier, but you could always spoon some in the middle, and it will spread over the cupcake. Top each with a bit of coconut right after the glaze has finished spreading, before it sets or the coconut won't stick. 


Toasted coconut 
2 cups sweetened shredded coconut 
Spread evenly over a baking sheet lined with parchment and bake at 325 for about 7 min, rotating halfway through. Just keep a close eye on it. You may have to shake it halfway through to disperse the coconut so it cooks more evenly. Cook until its golden brown. 


Friday, July 2, 2010

some more cupcakes to come

I will be experimenting with a lychee nut cupcake tomorrow so stay tuned i will have pics and recipe asap.

Sunday, June 27, 2010

cakes

I know it's been a really long time, life's just been a bit stressful lately. It's also just been way to hot to do any baking in my little apartment. So i figured i'd post a couple pictures of some cakes i've done at work.


This is a buzzlightyear decoration i made for a cake (all fondant)


Hello Kitty cake (fondant)


Noah's Ark cake, for a christening


I'll try to post some more pictures, and hopefully there might be a day cool enough for me to do some baking. 

Saturday, June 12, 2010

Easy Chocolate Swirl Cheesecake

Here is a recipe and some photos of a chocolate swirl cheesecake i made the other day. Its a bit simpler than your standard cheesecake recipe. It also doesn't require the use of a springform pan which is typically necessary for cheesecake making. So if your looking for a fairly simple dessert and you love chocolate, i would definitely give this recipe a shot.


Easy Chocolate Swirl Cheesecake 
Ingredients:
1 8oz package cream cheese
1 14oz can sweetened condensed milk
2 tbsp lemon juice 
1 tbsp vanilla extract 
1 egg
1/3 cup chocolate chips, melted 
1 chocolate pie crust 


Directions:
1. Beat cream cheese until fluffy. Then gradually beat in the sweetened condensed milk, lemon juice and vanilla. Add egg and beat just to combine. 
2. Pour about half the cheesecake mix into the crust.
3. Then melt your chocolate chips, and add about 1/2 cup of the cheesecake mixture to the chocolate and fold together. 
4. Pour the mixture over the cheesecake 
5. Then pour the remaining plain cheese cake mixture on top, then with a butter knife swirl the cheesecake. 
6. Bake at 300F for 50-55 minutes. Then remove from oven and let cool on wire rack for 1 hour.
7. Refrigerate for at least 3 hours. However is best served after it has been chilled overnight. 


And heres a final photo, and before i knew it the whole thing was gone! 


Sorry i haven't been updating too often lately, but i would like to point out the amazon application i added to my blog. Amazon is personally one of my favorite sites, and its great for baking supplies. So this will show you the latest deals on baking stuff. Hope you enjoy!
 
Blog Template by Delicious Design Studio